Showing posts with label smartphone review. Show all posts

OPPO Find 7a Review & ColorOS 2.0.0.i Beta (KitKat) Overview


     If you haven't already read my review of the OPPO Find 7, I suggest that you head there as this review won't be as throughout as that one since they are almost a carbon copy of each other in most parts. This review will focus on the differences that the Find 7a has over the Find 7 as well as the ColorOS 2.0 beta which is currently running on Android 4.4 KitKat available for Find 7/7a owners to flash. Without further ado, let's get started.

OPPO Find 7 Review - Is It Time for QHD?


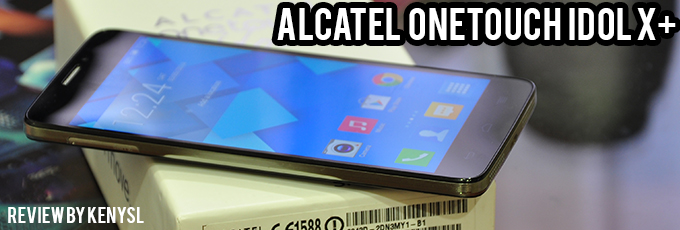
     While I am kinda late to the game, at last I had gotten a chance to review the OPPO Find 7 courtesy of OPPO Malaysia. Without further ado, let's get started with this late review of the OPPO Find 7, one of the frontrunners in the QHD game in the smartphone industry.

WHAT'S IN THE BOX?


The phone itself, a VOOC charger, a normal wall charger, MicroUSB cable, earphones and documentation.
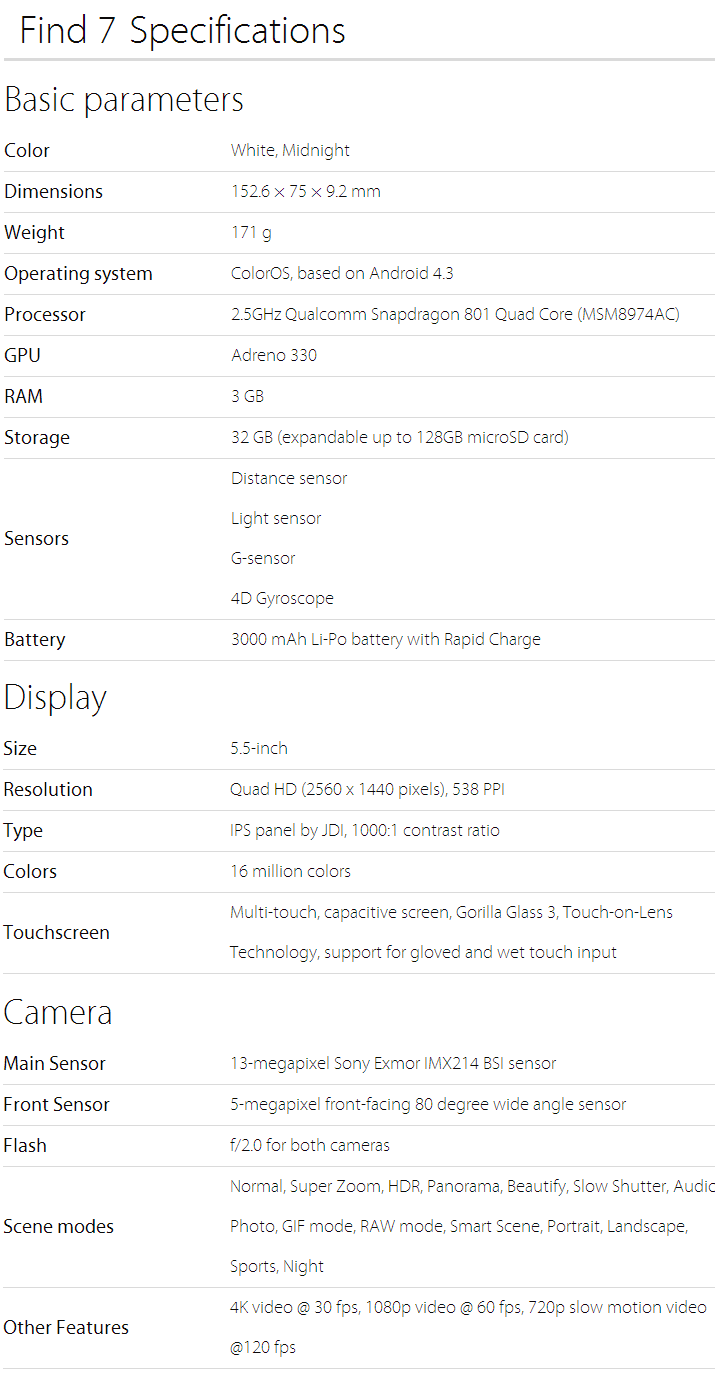
TECH SPECS


REVIEW
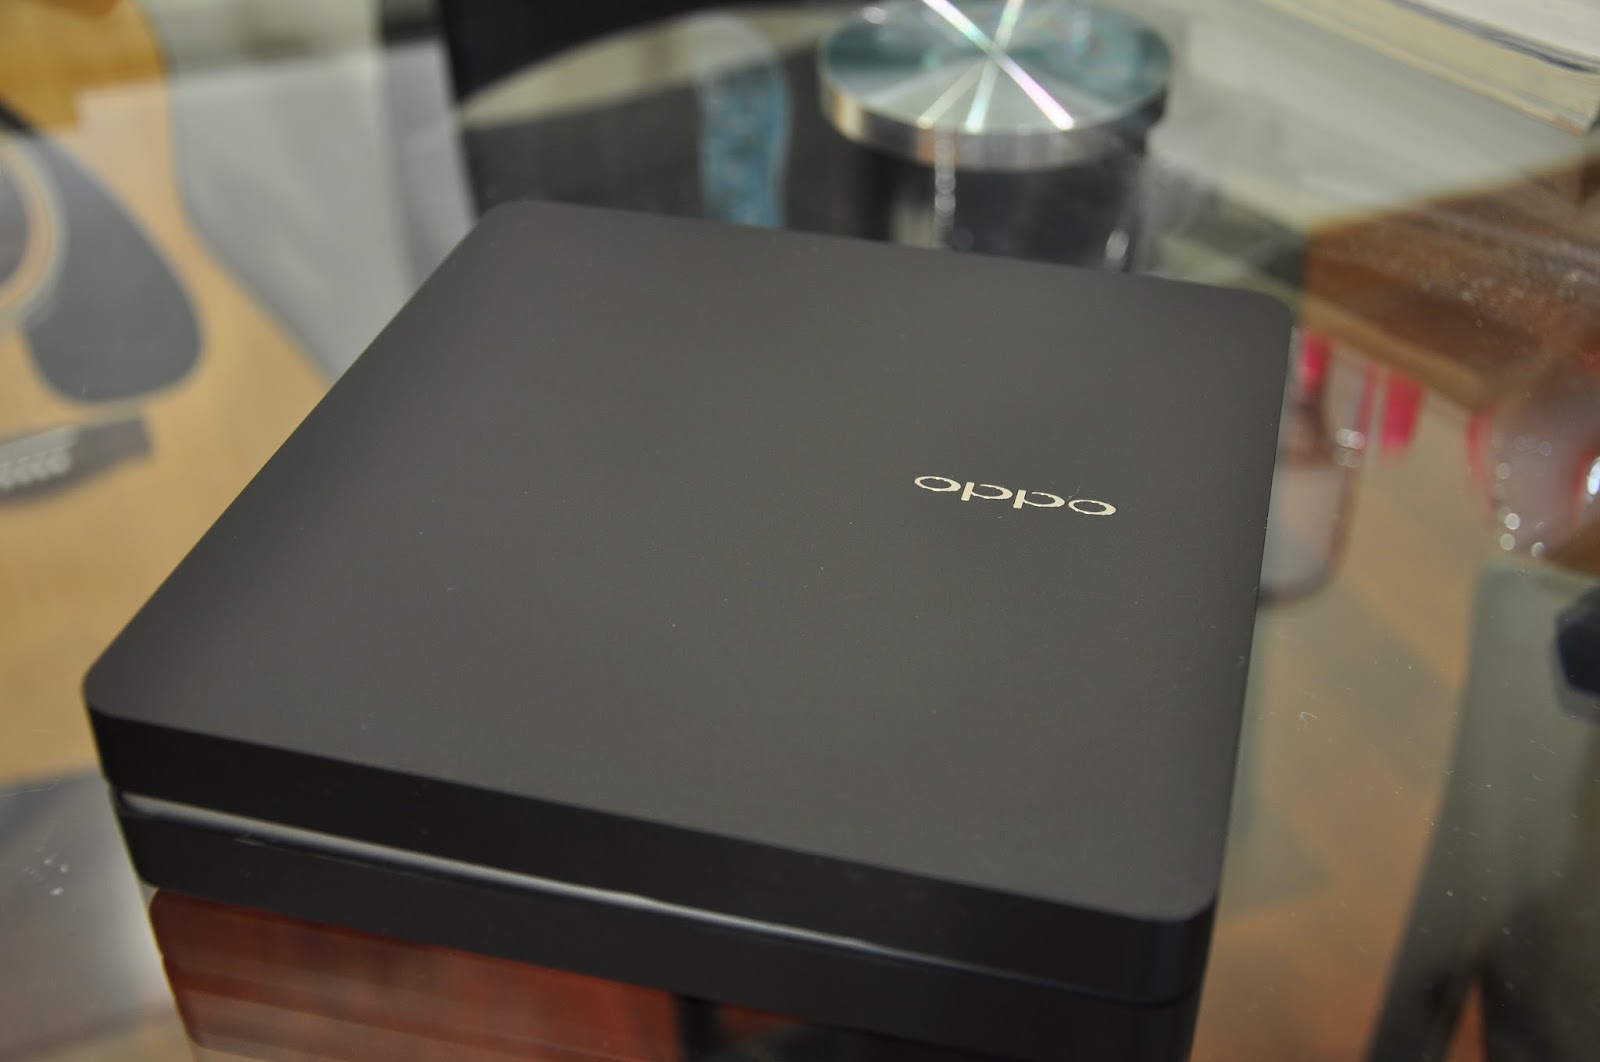
     Let's start with the packaging. As usual, unboxing a flagship device from OPPO is truly an 'experience'. Instead of the white box we got with the N1, this time we are treated with a black box made with the same finishing. In the compartment below the phone, we find all the accessories tucked neatly inside.


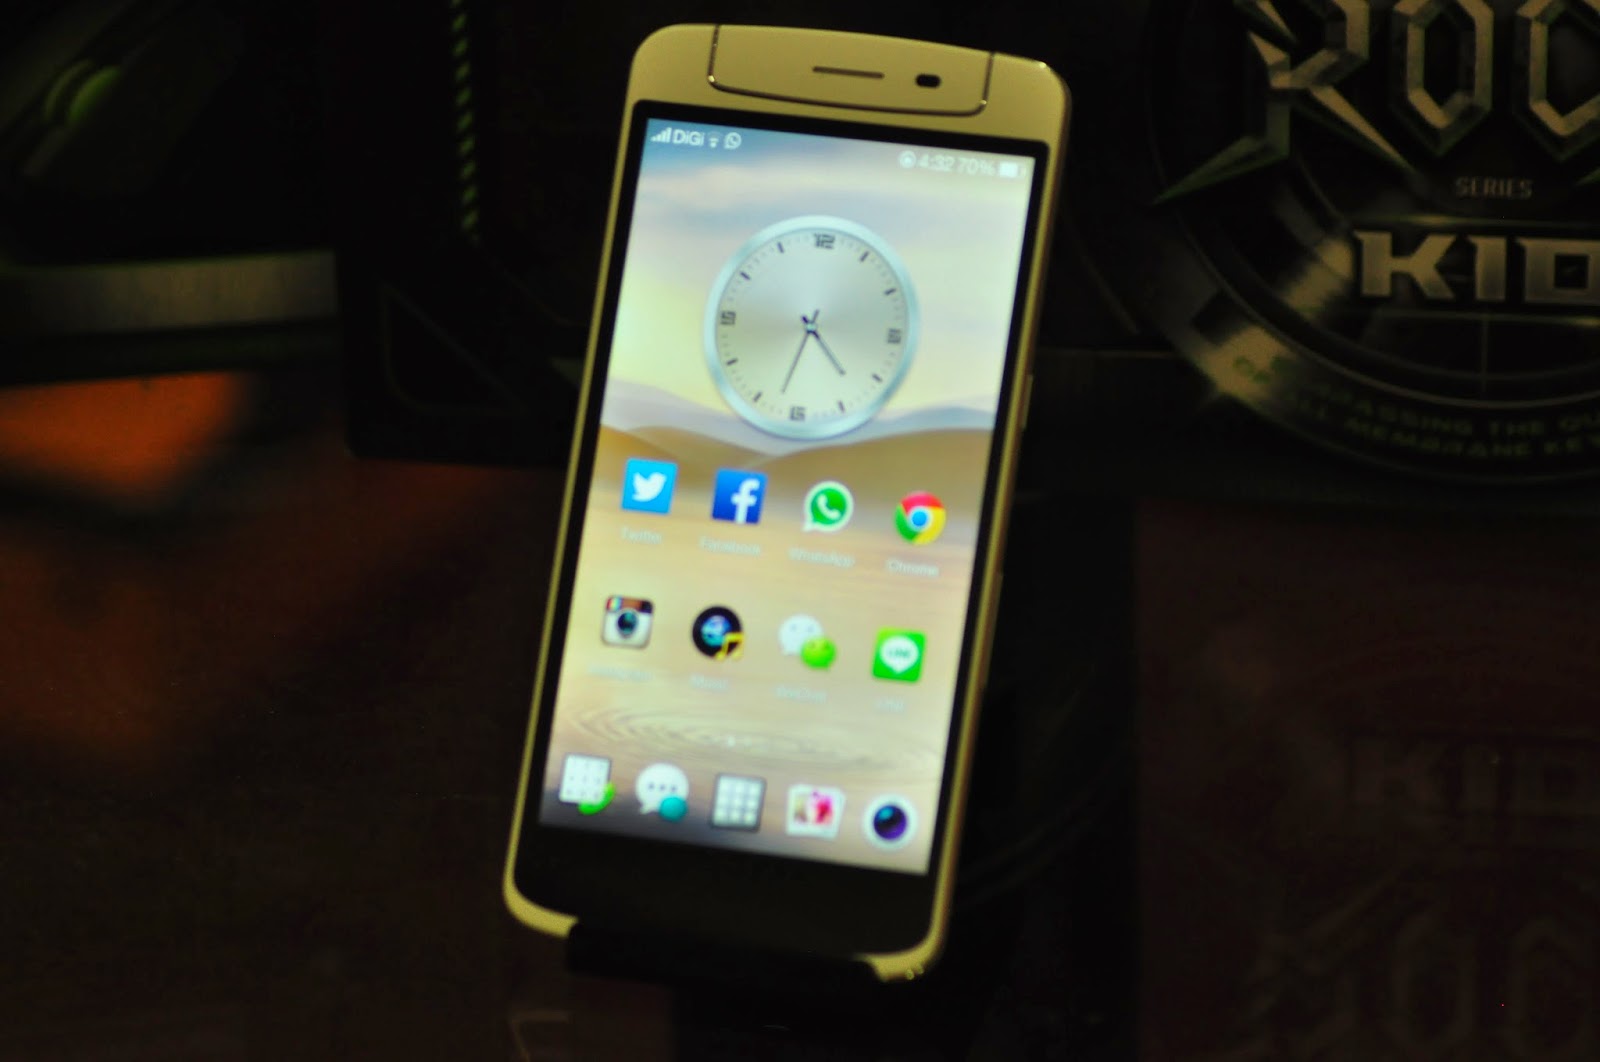
     Enough chirping about the packaging, let's shift our focus to the star of the show, the Find 7 itself. Today I have with me the Astro Black variant of the Find 7. The Find 7 also comes in a White variant as well. Looking at the front of the phone, we are greeted with a 5.5" QHD (2560x1440) IPS display, accounting for a whopping 538ppi. In a previous post, I discussed whether it is necessary for manufacturers to push the boundaries beyond FHD (1920x1080) on smartphones; my answer was yes but after trying out the Find 7 myself, I had a change of mind. I also have the Find 7a, an identical twin to the Find 7 with some slight differences including a FHD display instead of a QHD display. Holding them both side by side, I could barely see a difference in terms of sharpness or clarity. Don't get me wrong, the display on the Find 7 is still one of the best displays out there in the market, but as a matter of fact, I would never hold my device close enough for me to notice the smoother edges that a QHD display has to offer. If you would like to read up more on how more pixels affect things, you can read the "Technical" section on this Wikipedia article. So, to answer the question whether QHD is necessary for smartphones, the answer is no; However, is it cool to have? You are damn right it's cool to have one.


     Even though it's been a wall of text talking about the QHD display, we aren't done talking about the display yet. An issue that came up right before the release of the Find 7 was a controversy about the colour temperature of the display compared to its FHD counterpart. It was argued that the colour on the display of the Find 7 was not as vibrant as on the Find 7a. To test this out, I've put both the Find 7 and Find 7a side by side displaying the same photo.

Top: Find 7a, Bottom: Find 7
Left: Find 7a, Right: Find 7

     From the two pictures above, you can make your own verdict about the displays. My verdict though is that the Find 7's display is a tad pale compared to that of the 7a. Some colours just don't look as vibrant as it should on the Find 7. After comparing a few pictures, I found that some like previously stated, look better on the 7a but some other photos look better on the 7 instead. This is an opinion that varies between person to person so you might want to have a look with your own eyes. Another little qurik I noticed was that the Find 7's backlight was a lot more dimmer on max brightness compared to that of the Find 7a. This is probably related to how hot QHD displays could get on high brightness levels. For context, max brightness on the Find 7 is roughly 75% brightness on the Find 7a or any other phone in fact. With this adjustment, there was no danger of the screen overheating; a good trade-off if you ask me. Oh and before I forget, the OPPO Find 7/7a comes with a screen-protector pre-installed!


     Looking further downward, we see the capacitive buttons featured on the Find 7. As an Android purist, the layout irks me as it is still using an ancient layout with a menu, home and back button from left to right. I have no problem with using capacitive buttons but would OPPO please update the layout to back, home and recents instead to comply with Google's design guideline. Anyway, just a minor complaint from an Android fanboy, typical users will be just fine using this layout. Below the buttons, we find a LED strip notification light which OPPO dubs as the 'Skyline' notification light. This is one of the coolest LED notification lights I've seen in a while; while not the first one to be seen sporting this config, it's still pretty much a highlight of this particular phone. One more modification I would like OPPO to make is to have it shine in multi-colour instead of just blue, as I have a need for different shades of notification to tell me whether a notification is urgent or not. Otherwise, a big thumbs up to OPPO for including this.


     The sides of the phone are tinted black on this variant on the phone, with the other variant tinted white. On the right side, we find the volume control buttons which is easy to locate for it has a little edginess to it. The power button is located on the left side of the phone which also sports the same edginess found on the volume controls. Both the power and volume controls are easy to locate due to the previously mentioned edginess of the buttons. One-handed operations wise, mispressing wasn't an issue throughout my one month testing period.


     Turning the phone around, we get to see the nicely textured back cover. The back cover on this Astro Black variant is smooth to the touch. Visually, the texture is as if it was something that was vinyl wrapped with carbon fibre. With that in mind, what I'm trying to say is that the texture is cool to have.


     Opening up the back cover, we see the battery as well as the MicroSIM slot (if you squint your eyes hard enough, you can see the MicroSD slot above the battery on the right). Let's focus on the battery. You can see the wordings 'VOOC' etched onto the lower part of the battery. VOOC is a battery technology which OPPO claims to be able to charge faster and safer at the same time; of course this technology would come with a proprietary charger as seen from the unboxing pictures.


     While I can't test whether the battery is any safer than the norm, I can test how fast the battery is able to be charged. Within 10 minutes, using the VOOC charger, the Find 7 was charged from 8% to 33%; giving the phone another 22 minutes, it charged to 80%. Pretty impressive results and from what I observed, there isn't any sort of unusual heating up during charging. Nice to have for those who can't stay in one spot for too long or when you forgot to charge your phone overnight.

     Right below the battery, we find 2 honeycomb formations which comprise the speakers for the Find 7. From my experience, I found that these speakers can blast at a pretty high volume. For the first time ever, I don't have my ringer set to maximum volume because the Find 7 on maximum volume is so loud, it was obnoxious for me for the first few days. Of course, this isn't a bad thing because it's not uncommon that some media files to have very low volume. With the speakers as well as OPPO's MaxxAudio implementation, the speakers perform spectacularly well compared to other back facing speakers.

Normal Mode
 UHD mode
     Since we are done talking about most if not all of the external stuff, let's talk about the Find 7's camera. The Find 7 is equipped with a 13MP f/2.0 lens; but what makes it different compared to other flagships that also fancy the 13MP camera nowadays? Let's find out. Firing up the camera app and going into the 3-dot menu on the top right, we find a few different camera modes; most notably, the UltraHD mode. OPPO apparently implemented a software feature to enable the camera to take photos of 50MP quality by stitching together 10 photos together. Above you will see a photo taken using normal mode, and the other in UltraHD mode.

    As seen from the samples, the photo taken in UltraHD mode is significantly brighter compared to that of the one taken in normal mode, which is probably due to how the 10 photos are stitched together. Unless you are someone who processes all your photos through Photoshop (colour balancing & downscaling for crisper photos); I recommend that you should just stay with 13MP as the file size in 50MP mode is 3.5 times larger than photos taken in 13MP mode (10.4MB vs 2.92MB) and you could barely notice a difference on your phone. Speaking about pros, the camera can also output in RAW format for even more intense editing in Photoshop. There are also some other fun modes like voice photo, slow shutter (for those amazing highway night shots), GIF, panorama and not forgetting OPPO's very own beautify which significantly reduces complexions on skin. I have posted more photos taken with the Find 7 which you can find here.


ALCATEL ONETOUCH IDOL X+ Review


     If you still remember, ALCATEL ONETOUCH launched their new flagship, the IDOL X+ last March. Fortunate to say, today I have the IDOL X+ with me courtesy of ALCATEL albeit a bit late since it's already May. Without further ado, let's get started with a late review of the IDOL X+ along with it's featured accessory, the BOOMBand.

OPPO N1 Review - The 13MP Selfie-nator


     If you have been paying attention on my blog, you would remember that last month, OPPO has just officially entered the Malaysian market where they launched their N1 flagship alongside with the Find 5 Mini, R1 and Neo. Lucky Ken here has been given the N1 and Neo units for review purposes courtesy of OPPO Malaysia. Without further ado, let's get started with the review.

WHAT'S IN THE BOX KEN?


The smartphone, wall charger alongside with the USB to MicroUSB cable, earphones, a SIM ejector tool and some product information.

TECH SPECS


REVIEW
     Before you continue reading this review, I would like to first say that I have been using the N1 as my daily driver for more than 2 weeks now; I believe firmly that in order to find out the ins and outs of a phone, one needs to use it as how it was intended for users when they buy a phone instead of just fiddling around with the device for an hour or so and then calling it a review. So do keep this point of view in mind while reading this review. Oh and forgive me for the weird colour balancing, my camera is acting up a bit.

     The N1 comes in a pretty sleek looking box. Like the phone itself, the box has distinct clean lines on the side and a slightly round footprint. Opening up the box, we find the phone itself sitting on the left side of the box along with its accessories on the right. I would have like to have seen some sort of soft foam around the phone just for safety measures but the phone came in tip top condition so there isn't really anything to complain about.


     Looking at the phone, we see the uni-body matte white design that is very pleasing to the eye. Moving our focus to the side, we see a unique silver coloured line embodying the entire sides of the phone. Officials said that this line design makes the phone looks slimmer than it actually is; while I don't really see how that makes sense, the design makes the humongous (6.72 x 3.25 x 0.35 inches) phone much more easier to grip though. Along the right side of the phone, we find the power and volume control buttons. The power button is placed at a position where it is easy to reach when operating the phone with only one hand, but the same can't be said about the volume buttons; trying to reach for them with my thumb is a no-go. However, if you were to operate the phone with your left hand instead of your right, this problem would not be present. On the left side, we find the SIM tray.


     Moving to the bottom of the phone, we find a 3.5mm audio port, a MicroUSB port and the phone's loudspeakers. Compared to the typical loudspeaker that is placed on the back of the phone, I am unsure of which of the two I prefer. While the N1's placement will allow you to sort of control in which direction that sound will be louder a tad, it still faces the same problem like any other phone which has loudspeakers on the back of the phone; the users hand will be blocking the speakers when using the phone in landscape mode. The 5.9 inch N1 could had been the perfect media consumption device that fits in your pocket, if only the speakers weren't blocked. Rants aside, the speakers sound wonderful with adequate loudness when placed correctly.


     Unlocking the phone we are greeted with a crisp 1080p display and when calculated, a whopping 373 Pixel Per Inch count. Colour reproduction wise, the IPS display featured on the N1 is top notch without being too colour saturated. The screen also features Gorilla Glass instead of the much more stronger Gorilla Glass 2, but I guess it still does its of job preventing the phone from getting any scratches from subtle movements.


     Above of the crisp 1080p display, we find the earpiece and the light/proximity sensor. The ColorOS integrates a lot of interesting software features which I will cover later on. Now if you didn't know any better, you would notice that the line design envelops the top piece of the phone. This is due to the star of the phone, the rotatable camera! Yes, you seen right, a 13MP camera that acts as both the front and back facing camera with a very interesting rotating mechanism. One concern that I had when I first heard of this mechanism was that it might shorten the lifespan of the device as more moving parts almost always equate to higher breakdown rate. Fortunate to say the mechanism feels pretty solid and OPPO ensures that you can rotate the mechanism 40 times a day, 7 years straight, so I'm confident that my past worries were unwarranted. Camera performance wise, I will leave some pictures here and let you guys be the judges yourself. Oh, and don't forget all the high quality selfies one could take! Social media advocates around me absolutely love the unmatched quality of selfies.

N1 camera photos
     Now let us get into the heart and soul of the device, the software underneath the hood, ColorOS. The N1 runs on a skinned version of Android v4.2 Jellybean which they dub as ColorOS. One concern that I always hear from consumers is that the manufacturers modification the Android operating system makes a phone with awesome specifications on paper run like an entry-level device with sluggish operation. Fortunate to say, the ColorOS does not seem to make that big of an impact on the performance of the phone itself.


     The native launcher in ColorOS features something they call 'Exclusive Space' that currently features a gallery widget and a music player widget with more to come. While this widgets are certainly cool, there are some flaws to them. Like the gallery widget, you have to take a photo using the widget itself in order to have it be featured on the timeline-esque gallery. The music player also lacks something that a lot of users try to do seeing the widget looks like a old scratch disc player, the actual scratching movement to rewind or fast forward the track. ColorOS also has a misoperation prevention feature that does what it say and prevent users from "butt-dialing" which I find in dire need since I prefer not having a screen-lock code.


     While not impacting the performance of the N1 too much, ColorOS seems to add much needed software features to add value to the entire package if I dare say. ColorOS focuses a lot on using finger gestures to operate the phone. A lot of people I know user their smartphones in conjunction with a software home button that allows users to operate the phone without actually using the hardware buttons in fear of critical damage to the buttons. The gesture control that OPPO features on the N1 seem to fit the taste of such audience. The gesture controls range from controlling the volume to taking a screenshot which is all pretty handy. The ones I love the most is the double-tap to wake which resembles LG's knock-knock and also the fact that you can set your own gestures to launch actions that are defined by yourself using the gesture panel that is activated by swiping down on the left side of the status bar.

     After my very long three paragraph rambling of the ColorOS, if you are still not sold on it, don't fright, as the N1's bootloader is already unlocked. This means that you can flash custom ROMs onto the N1 as it is without going through a headache inducing process found on other devices. The N1 also has an official CyanogenMod port that runs on CM11, so hooray KitKat. If you dislike CM, there aren't a lot of choices other than OmniROM as it seems that the N1 has a less than stellar ROM developer community as you can see from xda-developers. If you didn't understand a single word from this paragraph, don't worry as the ColorOS is a very solid OS itself.


    At the back of the N1, we find a very interesting square that works as a touch panel which OPPO has accordingly named it the O-Touch. Users can scroll through news feeds, flip through e-books many more. OPPO has also to an extent integrated the O-Touch to a lot of the applications available natively. For an example, you could tap the back panel to take a photo in the camera app, or start a recording in instant messaging apps like WeChat, Whatsapp and alike. Personally I find the back panel a nice little addition, but sometimes it seems to register touches even though I did not intend to utilize it, so most of the time I have the O-Touch disabled in the settings.


     The N1 also comes with a neat little accessory called the O-Click, which connects to the phone via Bluetooth. OPPO markets it as an accessory that you can attach with your bunch of keys. The O-Click can function as a remote to activate your camera shutter, or as an anti-theft device where both the N1 and the O-Click will give out a warning alarm when they are too far apart. While I don't find a need for that, but hey, the more options you get the better right?


     Using the N1 as my daily driver, I normally unplug the phone from charging at 6:30 in the morning, and when I come home around 4:00 in the afternoon I usually have 60% or so left. While I am not a power user of any sorts, with the N1's 3610mAh battery capacity, one can get about 4 hours of screen on time which consist of browsing through social media networks and reddit and little amounts of video playback if one were to blaze through full capacity.

     Another thing I would like to cover before I forget is that OPPO Malaysia is only bringing in the 16GB model of N1. While I am no CEO, I think that it is a very weird decision. Even though it says 16GB on the spec sheet, actual space available to users is only about 10GB. For those who have an extensive MP3 library at their disposal, I'm afraid that the 10GB usable space is pretty unacceptable. Not forgetting that the N1's ability to take high quality photos, which in terms reflect in taking up more space in the phone; avid mobile photographers might also be disappointed with the very limited space. Sure OPPO offers 5GBs worth of cloud storage with its O-Cloud app, but I'm afraid that does not really help the situation. While I am not always shouting "rar rar give me SD card slot", the N1 is in dire need of more storage since there is no indication that OPPO Malaysia would be bringing in the 32GB model.

CONCLUSION
     After spending almost 3 weeks with the OPPO N1, I have come to love what OPPO has done to add value to their devices via ColorOS and the good battery life. The rotating camera is also a very big selling point with it being able to take high quality photos at almost any given angle.Despite having apparent problems like limited storage and questionable loudspeaker placement, I think the N1 is well worth the RM1798 price tag; which is on-par with phablets of its class.

     That marks the end of this review! What do you think of my first ever smartphone review? Where do I need to improve and what important details have I left out? Do send your feedback over to kenyeohsl@gmail.com or just leave a comment down below. Greatly appreciate it and hope to see you on the site again!